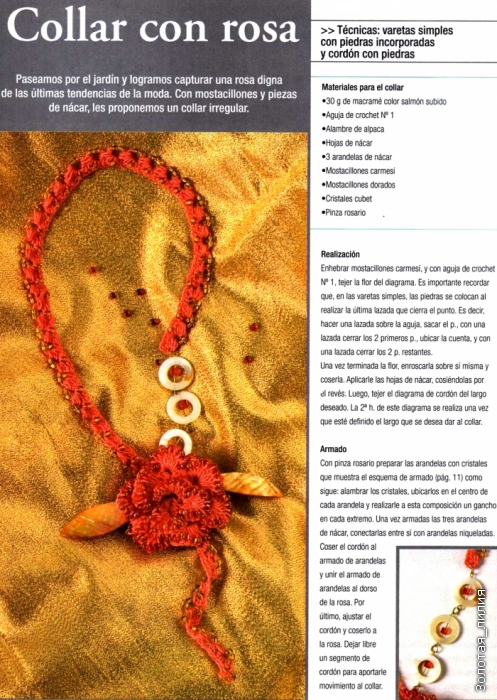
Crocheted jewelry: Rose collar necklace tutorial
Free crochet patterns and tutorial,
Find free crochet jewelry patterns including necklaces, bracelets, chains...

2.

3.

4.

Curabitur et lectus vitae purus tincidunt laoreet sit amet ac ipsum. Proin tincidunt mattis nisi a scelerisque. Aliquam placerat dapibus eros non ullamcorper. Integer interdum ullamcorper venenatis. Pellentesque habitant morbi tristique senectus et netus et malesuada fames ac turpis egestas.

Curabitur et lectus vitae purus tincidunt laoreet sit amet ac ipsum. Proin tincidunt mattis nisi a scelerisque. Aliquam placerat dapibus eros non ullamcorper. Integer interdum ullamcorper venenatis. Pellentesque habitant morbi tristique senectus et netus et malesuada fames ac turpis egestas.

Curabitur et lectus vitae purus tincidunt laoreet sit amet ac ipsum. Proin tincidunt mattis nisi a scelerisque. Aliquam placerat dapibus eros non ullamcorper. Integer interdum ullamcorper venenatis. Pellentesque habitant morbi tristique senectus et netus et malesuada fames ac turpis egestas.

Curabitur et lectus vitae purus tincidunt laoreet sit amet ac ipsum. Proin tincidunt mattis nisi a scelerisque. Aliquam placerat dapibus eros non ullamcorper. Integer interdum ullamcorper venenatis. Pellentesque habitant morbi tristique senectus et netus et malesuada fames ac turpis egestas.

Curabitur et lectus vitae purus tincidunt laoreet sit amet ac ipsum. Proin tincidunt mattis nisi a scelerisque. Aliquam placerat dapibus eros non ullamcorper. Integer interdum ullamcorper venenatis. Pellentesque habitant morbi tristique senectus et netus et malesuada fames ac turpis egestas.


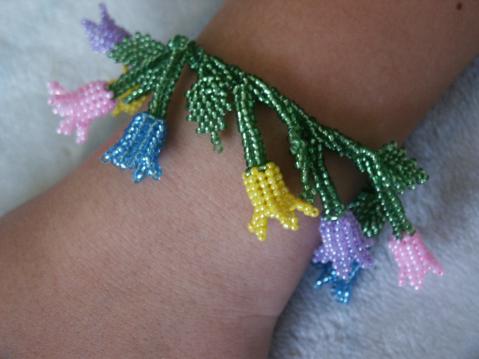
 In an attempt to grab hold of the last moments of summer, and to kill time while stuck indoors during the hurricane this weekend, my friends and I got together to make old school bracelets. Once we got started it was like riding a bike, and each only took about an hour. I am a fan of rocking a them with a bright watch, or mixing one with a wrist of mixed metal.